 |
An
Alternate Kayaking Mode-
Sailing Our Inflatable Kayak
|
Several years ago, I was invited to go along with a group of my former high school students on their annual river running kayak trips. Their only requirement was that I would have to come up with a boat. I could not pass up that offer! I ended up purchasing an AIRE Tributary Tomcat tandem from REI. This model was a step down from the ones that my friends were using, but it was still a pretty well-rated boat. Since the purchase, I have gone with the group on trips down the San Juan River, the lower Gunnison River in Colorado and the section of the Green River through Labyrinth Canyon in Utah.
This photo was taken at one of our campsites on the Green River. My boat is the red one in the foreground.
 |
The inflatable is well-suited for the river trips, but was not really designed for the quiet water paddling that I do more often. So the IK has spent most of its life rolled up and stored away in my garage waiting for those annual river trips.
I recently came across a video online associated with the website www.sailboatstogo.com that showed my inflatable converted into a sailboat! I thought that was a very interesting use of the kayak! The video can be viewed here. The "Sailboatstogo.com" company produces sailing kits for canoes and kayaks.
The company also sells plans for DIY folks to build their own sail rigs. I had ordered a set of plans and was ready to begin the construction project for the conversion of the Tomcat when my wife got wind of what I was doing. After seeing the video of the sailing kayak, she said to go ahead and purchase the kit.
I bought the "Any-Kayak" Sail Kit, and a 55 sq. ft. dacron sail instead of the standard 45 sq. ft. nylon sail. The larger sail meant that I had to upgrade to a longer mast, and extensions for the sail spars. I did not have to purchase outriggers/stabilizers. Those are necessary on sailing canoes and many of the other models of kayaks.
The pieces of the kit make-up into three assemblies. One assembly suports the mast and leeboards. The leeboards allow the kayak to sail upwind. The pieces fasten together with square shaped "U" bolts and pushbutton latches. The brackets attach to the kayak's tie down loops with straps.
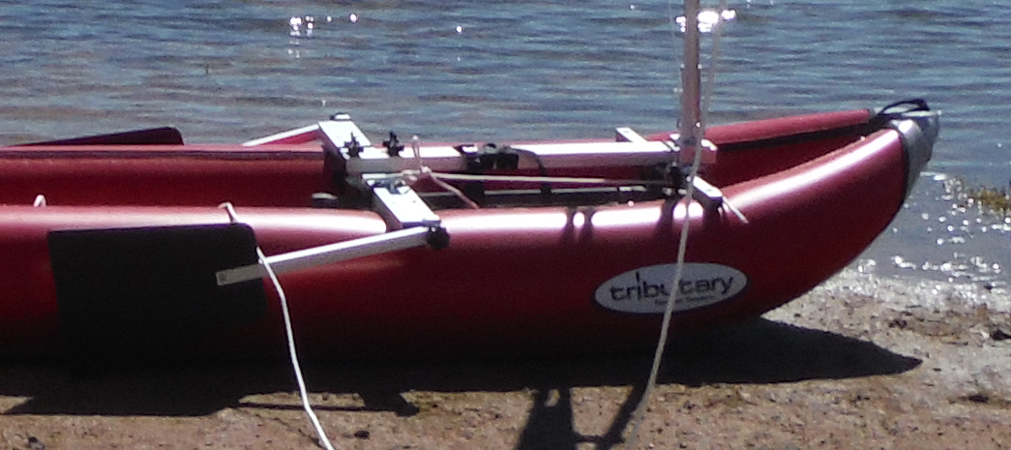 |
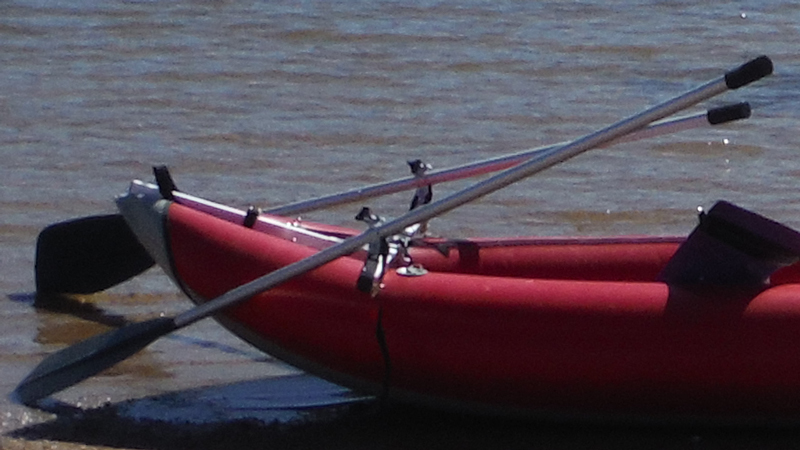
The second assembly mounts at the rear of the kayak and supports the two steering oars.
 |
The sail and its two spars make up the third assembly.
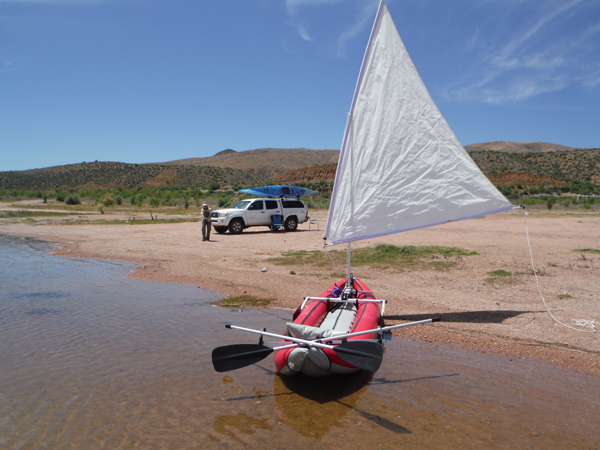 |
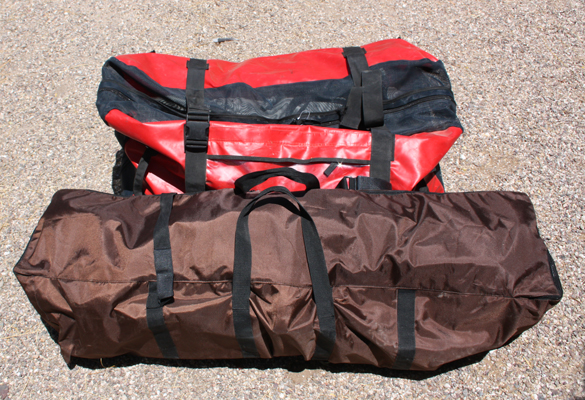
The boat and sail kit travel in two bags. The kayak is in the red bag and the sail kit is in the brown bag.
 |
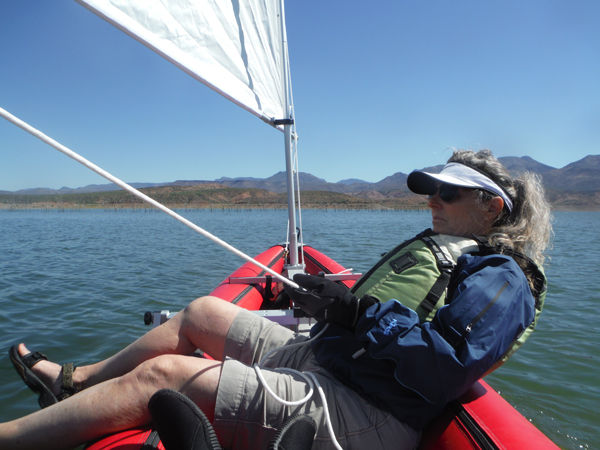
So far, we have been cautious in taking the boat out and have only ventured out in light winds that have been blowing onshore. The boat travels upwind well and feels quite stable. Choosing the larger sail seems to have been the correct decision. The boat does not seem sluggish with two people aboard. The soft sides of the kayak are very comfortable. This short video was put together from our first couple of voyages. My wife handles the boat well.
Through the years, we have had windsurfers and a small 14' sailboat. Those were a lot of fun. It looks like that we are going to have equivalent experiences with this sailing kayak. I have decided to use the plans that I purchased to get my grandkids involved in building a sailing rig for one of the canoes that we have.
Our favorite lake for wind-powered boating has been Roosevelt Lake in the central part of the state. There is a large beach area and a "no-wake" zone at the western end. The lake setting is also very scenic.
 |